Battered by the relentless rain, many sage gardeners will be sitting inside, mug of tea in hand, planning their garden activities for the coming year.
One area of activity that is rising up the agenda is the sustainable activity of making compost. We all know how damaging prolonged dry spells can be in the garden. Adding a layer of compost as a mulch or working it into the soil is a great way of helping retain necessary moisture without depleting our local reservoirs. The nutrients from the compost will also act as a free fertiliser which is particularly helpful if you are growing fruit and vegetables.
If you’re renovating a garden like me then you will have no shortage of weeds, dead leaves, grass clippings, hedge trimmings and plant prunings to make compost over the year. The reason that making compost is so environmentally friendly is that it saves on the fossil fuels usually needed to transport the garden waste away; compost it, repackage it and return it to your garden. Making your own compost saves on these costs and means that you have a fully traceable compost source that you can access a bucketful at a time from your own garden.
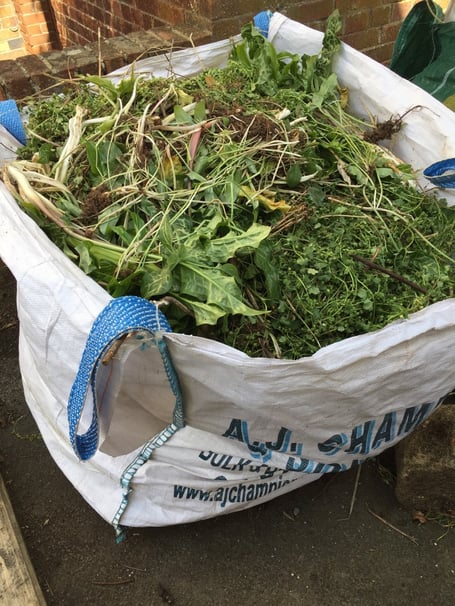
One easy way to make compost is to put your garden waste in a builder’s bag. This wins in my view over a black plastic tardis since the volume of waste in these smaller containers does not get big enough to decompose with any speed and it can be several years until the compost is usable. With a compost heap, bigger is better: the greater the volume of green waste the faster the decomposition time.


Builder’s bags can often be picked up free or very cheaply from Facebook Marketplace or Freecycle. Their enclosed construction deters pests such as rats who prefer to burrow into heaps from the bottom up. The builder’s bag has the advantage of containing the garden waste while it rots and when you eventually empty the bag out you can drag a partially-empty one around the garden to spread on your borders. Very handy!
Here are my top tips for making compost in a builder’s bag:
1) Place the bag on hard standing such as paving stones or tarmac if you can, since the heat of the hard surface in the warmer months will speed up the composting process;
2) Likewise, although there is a tendency to hide compost heaps away, the heat of the sun can be very beneficial in getting the composting process underway. I have mine at the side of my house since it makes it easy to add things from both the front and the back garden.
3) Chop the vegetation into small pieces with secateurs, a lawn mower or put hedge trimmings through a shredder: the ideal size for elements added to the heap should be around that of grass clippings;
4) Turn the heap periodically by either forking it into another bag with a garden fork or emptying out and then replacing it into the bag. This encourages the growth of bacteria which helps the decomposition process;
5) Incorporate vegetarian animal manure (rabbit and guinea pig waste, horse manure, chicken manure) to speed up the composting process:
6) Add food scraps sparingly to avoid unnecessarily attracting rats; balance these with vegetation or ‘brown materials’ such as cardboard to prevent the heap becoming slimy;
7) If you have the space, consider having more than one bag, since you will need to leave the heap for up to a year to rot after the last trimmings have been added. If space is at a premium then periodically turn the heap out and harvest the usable compost.
Compost is ready once you can no longer tell what the ingredients were: every gardener is allowed to have their own preference regarding when their compost is usable. I’m currently emptying some of my older builder’s bags which have been composting for just over a year. The texture is quite a thick mulch: any twigs etc that have not broken down enough are put on the next heap to have another turn (avocado pits I’m looking at you). I’m spreading it on my raised beds at the front of the house where the soil is a bit too low and using it to create raised vegetable beds. It’s an easy way to cover up to the required depth spring bulbs that I’m still planting and a great way to help the soil retain moisture in anticipation of another dry summer.
Instagram: @midsomerdiariesgarden
Comments
This article has no comments yet. Be the first to leave a comment.